Student Timesheet (TCP)
As a Time Approver, Payroll requests that you review your employee’s time worked in Timeclock Plus, so that your employee can be paid accurately and on time with no delays. The Timekeeping system allows you to review, edit and approve employee’s timesheets throughout the pay period.
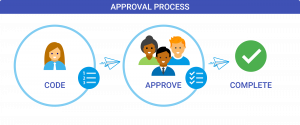
Manage Timekeeping Approval Process in Timeclock Plus
Need Assistance? Review the how to questions below providing step-by-step instructions
-
- Log onto 1600grand
- Under Student/Union Time Clock, click on Time Approver Login
- Click the 3 horizontal lines
- Click on Hours
- Go to Individual or Group Hours
- Select Last Period (defaults to open weeks), click Update
- If you approve time after the pay period ends make sure the date range reflects the last period
-
- To Add time segment(s)
- Click on Add, add time segment by using the calendar and clock function or manually enter date and clock times (hh:mm AM/PM)
- Select appropriate Job Code
- Click Save, time segment successfully added when visible in the timesheet
- To Edit time segment(s)
- Checkmark the box next to the time segment to edit
- Click Manage
- Click Edit, edit time segment by using the calendar and clock function or manually enter date and clock times
- Click Save, successfully updated when correction is visible in the timesheet
- To Delete time segment
- Checkmark the box next to the time segment to delete
- Click Manage
- Click Delete, the system will prompt a message to confirm Are you sure you want to delete the selected time segment(s)?, click Ok to remove time segment, successfully deleted when no longer visible in the timesheet
- To Update time segment(s) to the correction position
- Checkmark the box next to the time segment to edit (Unfortunately you can only edit any time segments one at a time)
- Click Manage
- Click Edit, edit Job code by using the drop-down menu, select the academic job (the academic position shows a different position# then what was original recorded in the timesheet)
- Click Save, successfully updated when correction is visible in the timesheet
- To Add time segment(s)
-
- Review remaining Accruals Tab for available balance
- Under the search bar enter employee ID or Name,
- Click Accrual tab (above the employees name), your accruals will display
- The Remaining column shows how much sick time is available to use
- Click the Hours Tab
- Click Add, then check the Timesheet entry option (this eliminates a need for a time out entry), then enter the Date and Start Time for the shift the individual was out sick
- Enter the total amount of sick time requested
- Under the Job Code field, use the drop-down select the appropriate job code that aligns with the sick time requested
- If individual has multiple jobs make sure to coordinate with the other supervisor to eliminate double usage
- Under the Student sick field, use the drop-down select the Sick code
- Click Save, successfully saved when visible in the timesheet
- Review remaining Accruals Tab for available balance
-
- Review employees time segments
- Under the Exceptions column review conflicting shifts and long shifts. The system will flag these categories as an exception and requires approval.
- Conflicting shifts are considered any shift that overlaps a secondary shift within the same timeframe (flagged with a red/orange circle)
- Long shift are considered any shift over 12 hours (flagged with a red/orange circle)
- Missed clock times (flagged with a blue circle in the exception column) indicates a manual adjustment to a missed clock in/out by the end user
- Additional exceptions will be shown as a blue circle these are information only to show supervisors a change to the clock in/clock out time by the employee.
- Under the Exceptions column review conflicting shifts and long shifts. The system will flag these categories as an exception and requires approval.
- Approve employees time segments
- Make sure to address all Exceptions
- Review all exceptions that indicate a red/orange circle prior to approving
- Go to Resolve Period
- Click all Approve radio buttons, then click Apply, successfully approved when column M indicates a checkmark
- Make sure to address all Exceptions
- Mass Approve departments timesheets
- Ensure all of your Exceptions are resolved
- Click on Group Hours
- Select Last Period (defaults to open weeks), click Update
- If you approve time after the pay period ends make sure the date range reflects the last period
- Go to Resolve Period
- Click all Approve radio buttons , then click Apply, successfully approved when column M indicates a checkmark
- Review/Approve inactive record in TCP
- Click on Hours
- Go to Individual or Group hours
- Under Individual hours– Type Employee Name in the navigation panel (inactive record will not show up); need to take additional steps below
- Under Group hours – Check the top box under the employee’s name to select all shifts (inactive record will not show up); need to take additional step below
- Click Employee Filter
- Uncheck boxes next to:
- Exclude suspended
- Exclude terminated
- Click Filter (EE record will populate)
- Select Last Period (defaults to open weeks), click Update
- If you approve time after the pay period ends make sure the date range reflects the last period
- Go to Resolve Period
- Click all Approve radio buttons, then click Apply
- Successfully approved when column M indicates a checkmark
Additional Information
- When approving timesheets after the pay period ends make sure the date range reflects the Last Period
- Fractions of hours must be rounded to the nearest 15 minutes and entered as a Fraction of the hour – for example 5.75 – 5hours 45 minutes
- Any time segments flagged with a Red X indicates hours apply to a different department and can only be approved by the supervisor of that department.
- If your employee has more than one job with a different department, you will receive the following error message: 9000009999 – Timeclock Test [XX/XX/XXXX XX:XX AM/PM] One or more approvals could not be changed due to job code access. Only the supervisor who manages that job can approve the time segment.
- Column M will populate a checkmark in the box when the time segment was successfully approved by the Manager (you and/or a different department)
- During the transition period from Academic to Summer and/or Summer to Academic please be mindful when approving time segments that the postion the individual used when clocking their hours is allocated to the specific job and aligned witin that specific term for example (Academic positions are aligned to Academic term and Summer positions are aligned to Summer term).
- If the position is not aligned appropriately please reach out to payroll at [email protected] to reallocate the hours to the correct positon/term.
Troubleshooting
When accessing your department timesheet(s) if you do not see an individual under your list of employees, it is likely a set-up issue.
- Questions regarding employee set-up should be directed to Human Resouces
- Review employees time segments
-
If you run into issues approving some of your student worker’s hours within Individual Hours in TimeClock Plus aka (TCP) there are 2 methods detailed below you can execute.
- To approve your student’s hours within Group Hours.
- Click the 3 lines in the left-hand corner of the screen (this will pop-out the navigation panel)
- Click Hours
- Click Group Hours
- Select Employee Filter, then select employee name
- Click Resolve Period using the drop-down menu
- Locate the Manager line and toggle the radio button from unapprove to Approve and then select the Apply button
- Successfully approved when column M indicates a checkmark
- Note: This action will approve ALL of the listed student’s hours, not just one student at a time. It is helpful to review and edit hours in Individual Hours and then approve hours in Group Hours.
- To approve your student’s hours within Individual hours
- Click the 3 lines in the left-hand corner of the screen (this will pop-out the navigation panel)
- Click Hours
- Click Individual Hours
- Check the checkbox next to each time segment (or select all the time segments by clicking the main checkbox on the header).
- Under the Exception box click Exceptions drop-down menu
- Locate the Manager line and toggle the radio button from unapprove to Approve and then select the Apply button
- Successfully approved when column M indicates a checkmark
If you have any questions or concerns, please reach out to Payroll at [email protected]
- To approve your student’s hours within Group Hours.
Are you a visual person? Visit the Tutorial page to review the how to videos
- Timeclock Plus Tutorials: TCP Users