



Student Timekeeping Approval
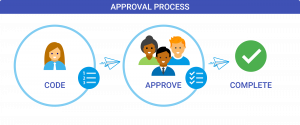
As a Time Approver, Payroll requests that you review your employee’s time worked in Workday, so that your employee can be paid accurately and on time with no delays. The Timekeeping system allows you to review, edit and approve employee’s timesheets.
Manage Timekeeping Approval Process in Workday
-
Workday can be accessed using either of the following methods:
Option 1: Mobile Device
- Open the Workday app on your mobile device
- Log in using Single Sign-On (SSO)
Option 2: Desktop Computer
- Open a web browser and navigate to the Workday website
- Log in using Single Sign-On (SSO)
How to Access using the Mobile Device
- Open the Workday app
- Sign in using Single Sign-On (SSO), or use your authorized fingerprint or facial recognition
- Access Time Entry Tasks
- Select My Tasks (bottom of the screen) OR
- Select Apps (botttom of the screen)
- Click Edit and Approve Time
How to Access using a Desktop Computer
- Log in to Workday using a web browser
- Log in using Single Sign-On (SSO)
- Access Time and Absence Management
- Click Managers
- Click Time and Absence Management
- Select Edit and Approve Time
-
Method 1: Approve Timesheets Individually via Workday Inbox using Desktop
- Acess Your Inbox
- Click the My Tasks icon in the upper-right corner of the Workday Home page
- Locate the My Tasks
- Under My Tasks – All items
- Select the Time Entry Request for the employee
- Under My Tasks – All items
- Review the employee’s submitted hours, daily totals, and entries for accuracy
- At the botom of the page. choose one of the following actions:
- Approve: To accept the timesheet
- Send Back: To return the timesheet to the employee’s inbox for corrections (you will need to provide a reason)
- Deny: To cancel the time entry submission entirely
- Verify Your Action
- Verify your action. A confirmation message will appear displaying the status of the transaction.
- Once timesheet is sucessfully approved continue through the approval process
- Repeat steps for each individual or departments (as needed)
Method 2: Approve Multiple Timesheets Using Time and Absence Management (Managers)
- Access Time and Absence Managment (Managers)
-
- Click Managers on the menu icon in the upper-left corner
- Select Time and Absence Management (Managers)
- Click Edit and Approve Time
-
- Accessing Employee Timesheets – There are two options available for accessing employee timesheets under Time and Absence Hub:
- Option 1: Access the Review and Approve
- Under the Time and Absence Hub
- Click Review and Approve Time
- Use this option to review submitted employee timesheets and approve them without making changes
- Option 2: Access the Edit and Appoval Time
- Under the Time and Absence Hub
- Click Edit and Approve Time
- Use this option when employee time needs to be corrected or updated before approval
- Option 1: Access the Review and Approve
- Filter Your Search Parameters
- Enter the appropriate review crieria, such as:
- Check the Review my direct reports only box
- Select a radio option to filter by All Workers, Workers with Hours to Approve, or Workers with Unsubmitted Hours
- Enter the Date or pay period
- Select OK
- Review Employee Time
- A summary table will populate with your team’s entered hours. Review the submitted time for your employees
- Approve Timesheets – There are two options available for approving based on the access method you choice to view employee timesheets:
- Option 1: Access the Review and Approve
- Select the checkbox next to each employee whose timesheet you would like to approve
- To Approve all displayed timesheets, select the checkbox in the header row to select all employees
- Click Approve at the bottom of the page
- Option 2: Access the Edit and Appoval Time
- To Approve all displayed timesheets, select the checkbox in the header row per category to select all employees
- Click Approve at the bottom of the page
- Option 1: Access the Review and Approve
- Verify Your Approval
- Verify your approval. A confirmation message will appear displaying the status of the transaction.
How to Edit a Matched Time Block When the End Time Is Incorrect
Use these instructions if an employee has a matched time block in Workday and the End Time is incorrect.
- Log in to Workday
- Use Single Sign-On (SSO)
- From the left-side navigation panel, hover over the Managers icon
- Select Time & Absence Management (Managers)
- Select Edit and Approve Time
- Enter your filter criteria and update the date to reflect the date of the shift you are editing, then click OK
- Locate the date with the incorrect matched time block
- Click the matched time block to open the time entry details
- Click Edit Time Entry
- Locate the Out/End Time field
- Update the End Time to reflect the employee’s actual time worked
- Enter a comment, if applicable, to provide additional information regarding the time correction
- Review the Start Time and End Time to make sure the entire shift is correct.
- Review the total hours to make sure Workday is calculating the correct amount of time worked
- Click Save or OK to save the correction
- Review the employee’s time entry again to confirm the corrected time and total hours are showing correctly
- If the time entry requires approval, complete the approval after confirming the corrected time is accurate
Additional Information
- If the time block has already been matched, do not try to edit the original clock-in or clock-out event. Make the correction directly to the matched time block
- Managers should only make corrections based on the employee’s actual hours worked. If you are unsure what time should be entered, please confirm the correct hours with the employee before making the correction
- Acess Your Inbox
-
As a supervisor, you can enter sick time on behalf of a student employee through the Absence module in Workday.
- Go to Workday and select Absence.
- Select Request Absence.
- Select the student employee you are entering the sick time for.
- Select the date the student was out sick.
- Click Continue.
- Under Type of Absence, select Time Off.
- Select the appropriate Sick Time option.
- Enter the number of hours the student was out sick.
- Review the date, absence type, and hours to make sure everything is correct.
- Click Submit.
After Submitting
- Once the sick time has been submitted, you will also need to approve the absence through your Workday approval tasks.
Reminder: Enter the number of sick hours based on the student employee’s scheduled hours for the date they were out.
-
Reviewing and Approving Absence Requests
From the Workday home page, access absence requests through My Tasks
- Locate My Tasks on the top navigation panel
- Click My Tasks
- Under All Items search your task list to locate the Absence Requests
- Review all absence requests and take the following actions:
- Approve
- Approves the request and routes it to the next step in the approval process
- Send Back
- Returns the request to the employee for updates or corrections
- The employee will revise and resubmit the request
- Note: Use Send Back only when a correction is needed from the employee
- Deny – Manager has the ability to deny the request
- Approve
- Note: Use Send Back for corrections rather than Deny whenever possible
Unexpected Time Off
-
If an employee is unexpectedly absent or forgets to submit a holiday or other time-off request, the recommended approach is to have the employee enter the absence upon their return. Alternatively, managers may send back related time entries for correction and process the absence in a subsequent payroll cycle.
However, managers also have the ability to enter an absence request on behalf of their direct reports when necessary.
- Locate My Tasks on the top navigation panel
-
How to Access using a Desktop Computer
- Log onto Workday using a web browser
- Log in using Single Sign-On (SSO)
- From your Workday Home page, Select the Managers Icon
- Click on the Time & Absence Management (Managers) application
- Under Time Tracking tab
- Click Edit and Approve Time
- Under Edit and Approve Time
- Enter date (date within the week your would like to review)
- Select Reivew by Dierct Reports only, By Org or By Worker
- Click OK
- Select the Week to Review
- Click the arrows left or right by the date to review the specific week
- On the grid you can see your workers time
- Workers without Alerts
- Wokers with Approved Time Entries
Additional Information
Troubleshooting
When accessing your department timesheet(s) if you do not see an individual under your list of employees, it is likely one of two reasons:
- Employee has not started their timesheet
- Reach out to your employee(s) to complete their timesheet to ensure their paid timely. As a supervisor this will not only allow you to see your list of approvals, it will also assure that everyone in your department has a timesheet and is set up to be paid
- Access issue with set-up
- Questions regarding access with set-up should be directed to Human Resources
Additional Resources
For detailed information about eligibility, accruals, and available leave plans, visit the Time Off Benefits webpage